Hey there,
The magic of Christmas is not only in the twinkling lights or the gifts under the tree but also in the joy of creating something special with your own hands. Whether you want to decorate your home or make a thoughtful gift, these DIY poinsettia projects are perfect for adding a festive touch to any space. From upcycled tin cans to candy-filled vases, each idea is designed to bring the warmth and beauty of poinsettias into your holiday celebrations. Get ready to let your creativity shine and make this season even more magical with these stunning and easy Christmas crafts!
This site contains affiliate links. I may earn a small commission, at no extra cost to you. I’d appreciate it if you can support me.
Idea 1: Tin Can Poinsettia Trio
You’ll need:
- 3 empty food cans (corn, soup, etc.)
- 3 mini poinsettias
- Shiny paper, cardboard, or thick yarn
- Decorative snowflakes
- String
- Hot glue or spray glue
- Screwdriver
Steps:
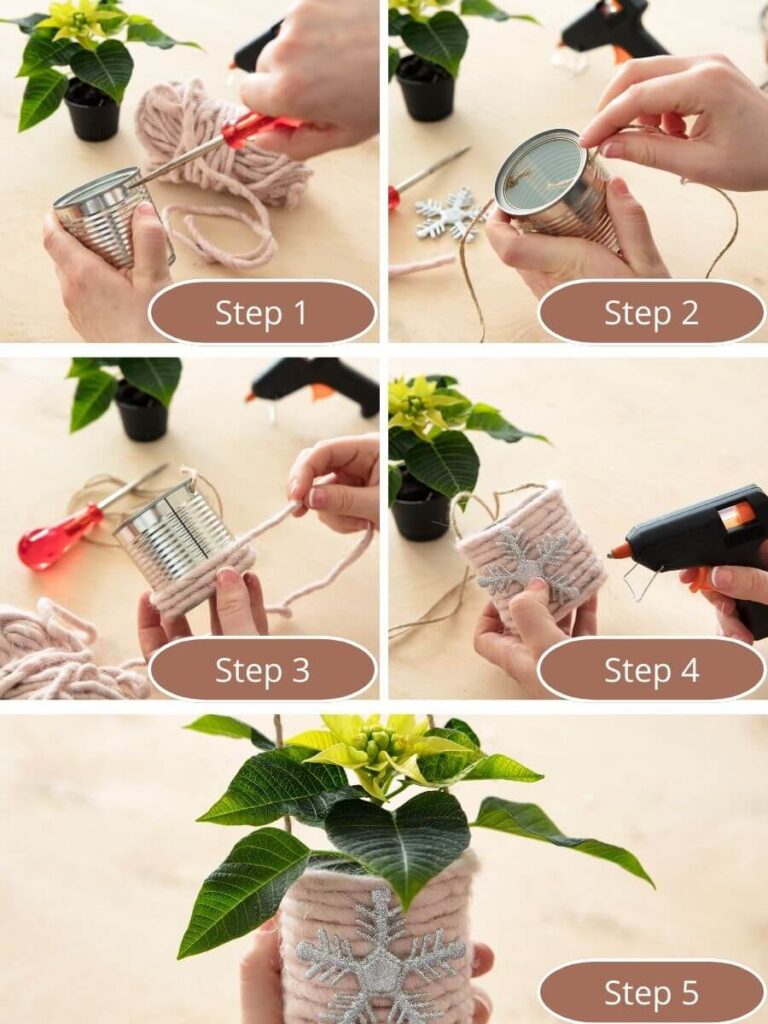
- Prepare the cans: Wash the empty cans and use a screwdriver to punch two holes just below the rim on opposite sides.
- Add strings: Thread string through the holes and knot securely on the inside, creating a hanger.
- Decorate the cans: Cover the outside of the cans with shiny paper, cardboard, or thick yarn using glue.
- Add snowflakes: Stick decorative snowflakes onto the cans for a final touch of Christmas charm.
- Place the poinsettias: Carefully insert your mini poinsettias into the decorated tins and hang them up.
Tip: Use a can opener that leaves no sharp edges to avoid accidents!
Amazon picks:
Idea 2: Upcycled Poinsettia Place Cards
You’ll need:
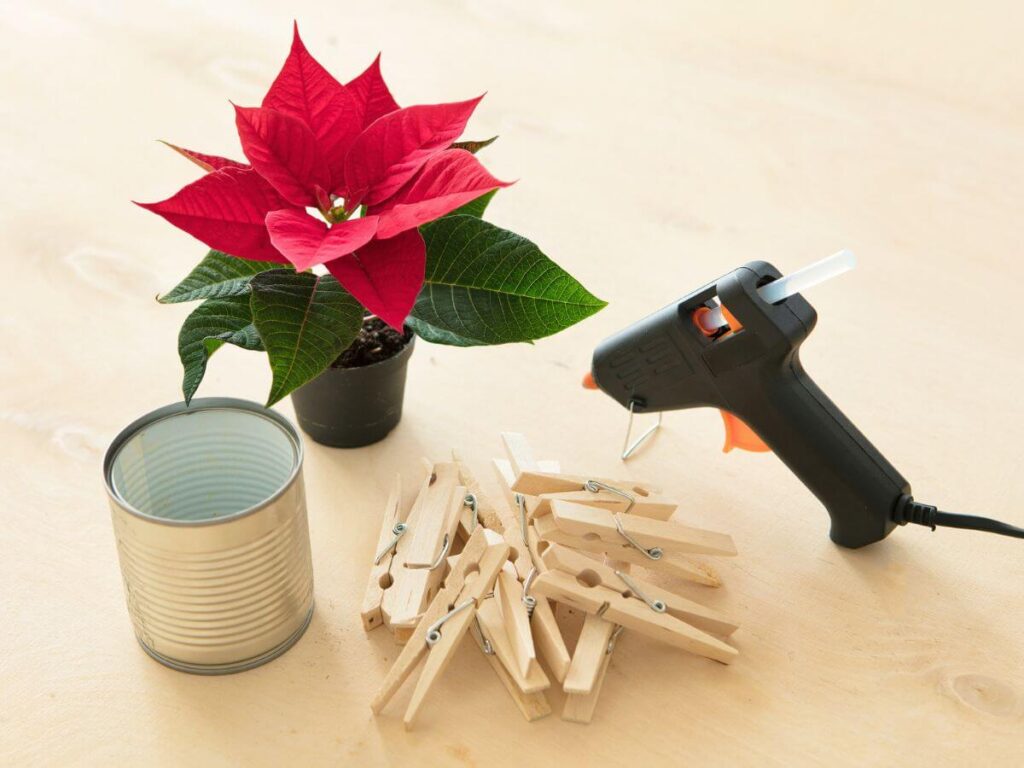
- 1 mini poinsettia
- 1 empty food can
- Wooden clothespins
- Hot glue
- Colored string
- A pen for writing names
Steps:
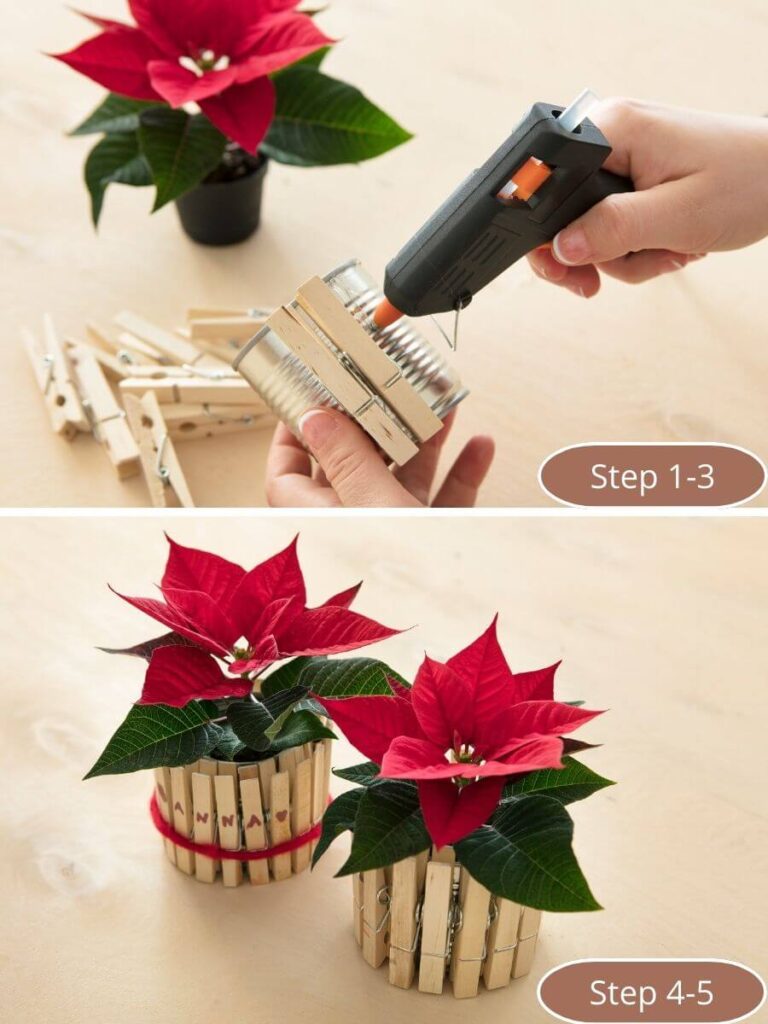
- Prepare the can: Remove the label from the can and clean it. Use a can opener that doesn’t leave sharp edges.
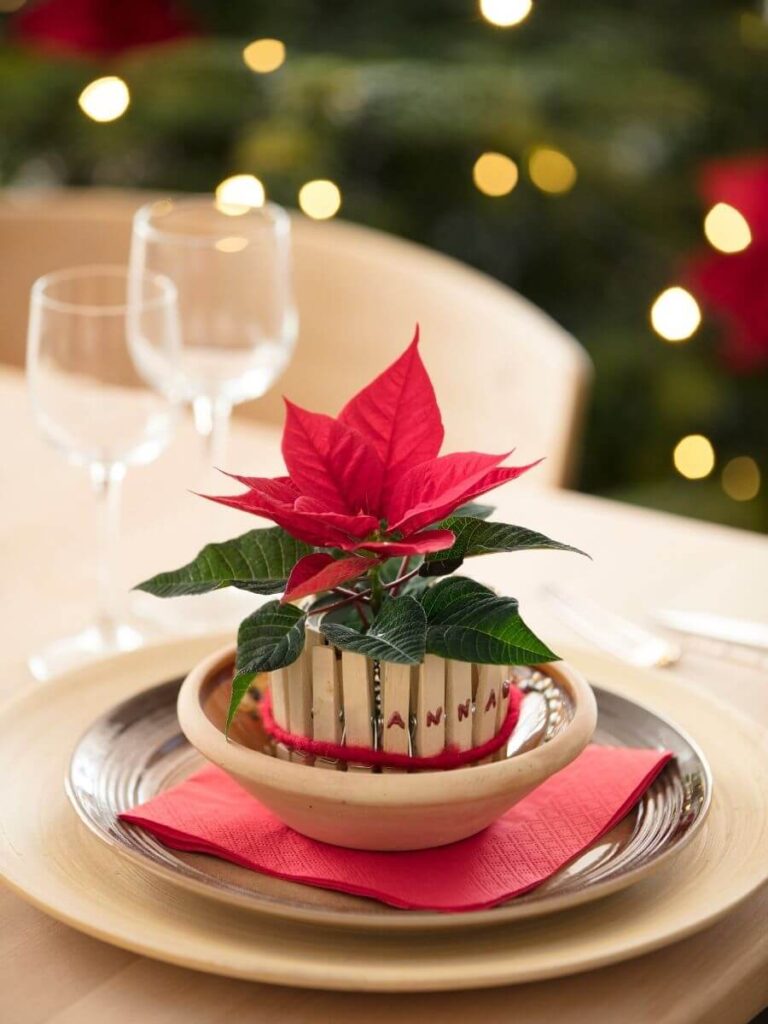
- Attach clothespins: Cover the can with hot glue and place wooden clothespins around the rim, with the clip ends facing down. Let them dry.
- Optional painting: If you want, you can spray-paint the clothespins in a festive color.
- Add a name: Wrap the colored string around the clothespins and write a guest’s name on the can.
- Insert the poinsettia: Place the mini poinsettia inside the decorated can, and voila! You now have a beautiful place card for your holiday table.
Amazon picks:
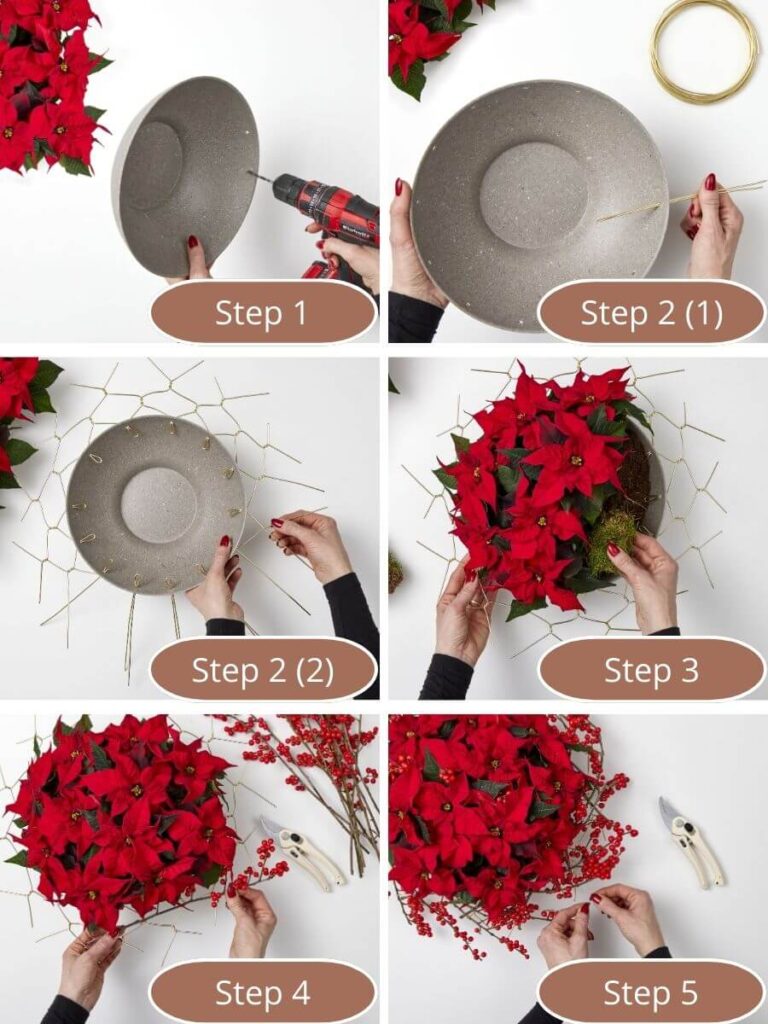
Idea 3: A Star-Filled Bowl
You’ll need:
- A plastic planting bowl
- Mini poinsettias
- Winterberry stems (Ilex verticillata)
- Compost and moss
- Thick and thin gold craft wire
- Drill and wire cutters
Steps:
- Drill holes: Use a drill to make small holes around the top edge of the bowl, about 5 cm apart.
- Add thick wire: Cut 25 cm lengths of thick wire, fold them in half, and thread them through the holes (1). Twist the ends to create a wire mesh. (2)
- Fill the bowl: Add compost to the bowl and plant mini poinsettias close together. Surround the poinsettias with moss.
- Arrange winterberry stems: Tuck the stems into the wire mesh, ensuring they all curve in the same direction to create a swirling effect.
- Secure the stems: Use thin craft wire to hold the stems in place so they don’t stick out.
Place your stunning star-filled bowl in a bright spot, and remember to water sparingly to avoid waterlogging.
Amazon picks:
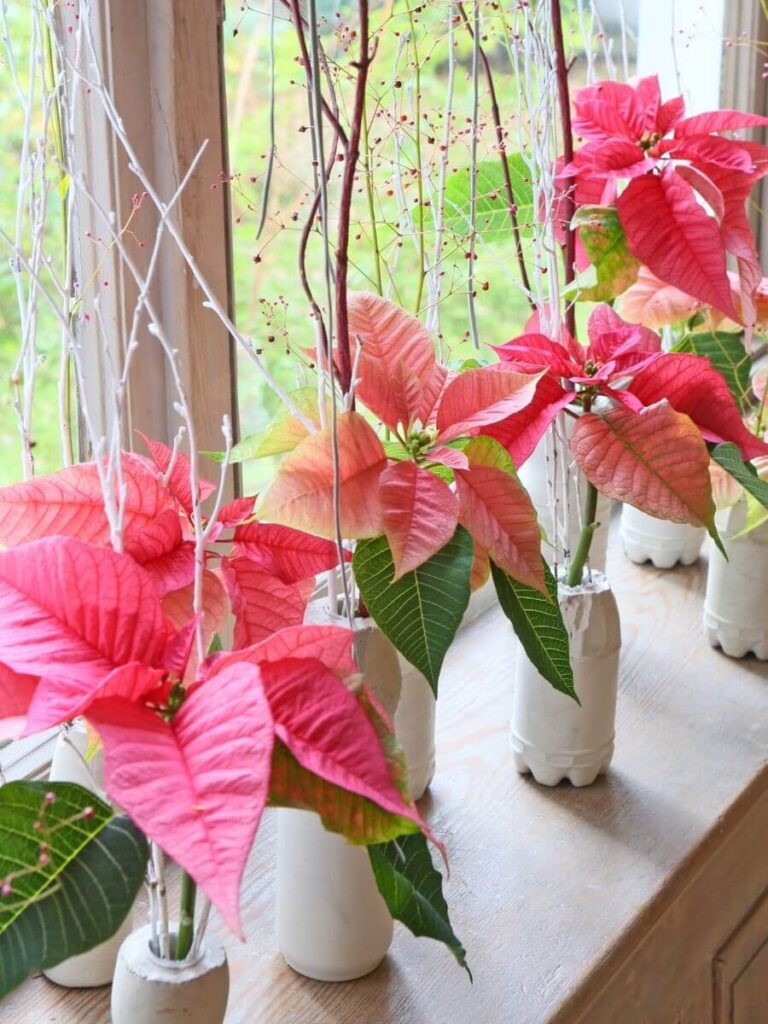
Idea 4: Cut Poinsettia in DIY Vases
Here’s a simple, stylish way to make your own concrete vases for cut poinsettias. Let’s get started!
You’ll need:
- PET bottles in different shapes
- Hobby concrete and water
- Plastic tubes or plastic cups
- Tape
- Decorative ribbons
Steps:
- Prepare the PET bottles: Cut the necks of the PET bottles to the desired height, then tape the plastic tubes in place. Mix the hobby concrete as directed, and pour it into the PET bottles.
- Remove the molds: Once the concrete is dry, remove the plastic tubes and peel away the PET bottles(1). Your vase is ready(2)! Repeat the process with different bottle shapes for a variety of vases.
- Decorate: Add your own touch by decorating the vases with poinsettias and ribbons.
- Optional water feature: If you want to place flowers in water, reinsert the plastic tubes into the concrete vases, fill them with water, and place the poinsettias inside.
Display these beautiful vases where everyone can admire them!
Amazon picks:
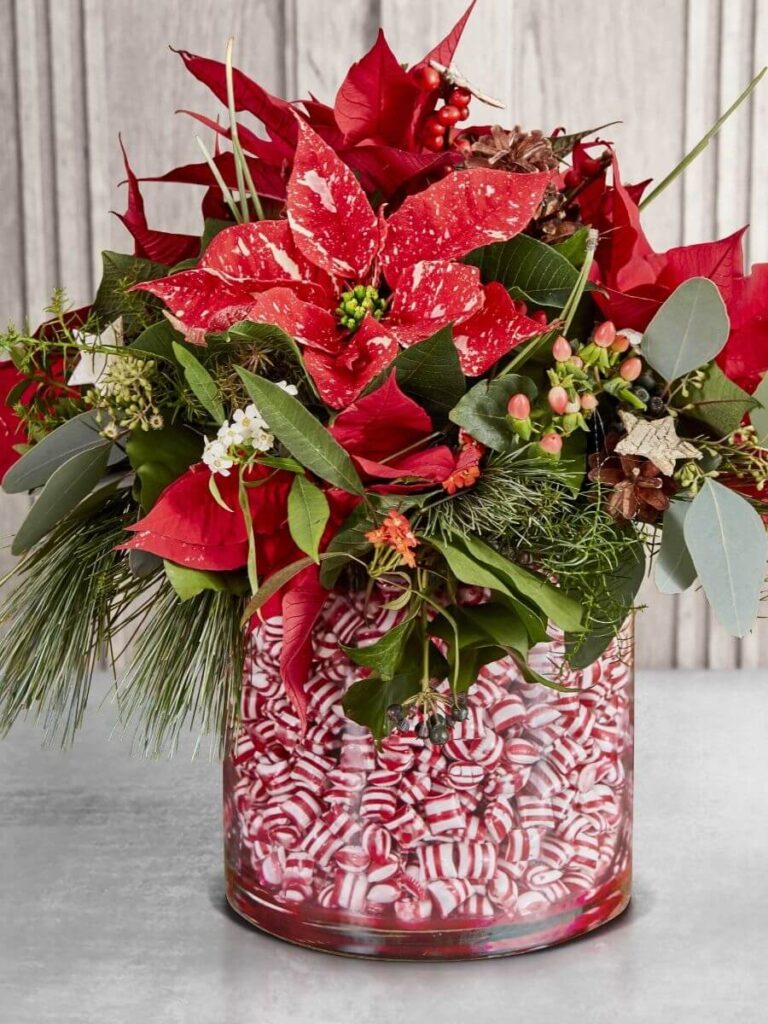
Idea 5: Eye-Catching Candy Vase for Christmas – A 5-Minute Craft
This easy candy vase idea will sweeten up your Christmas décor!
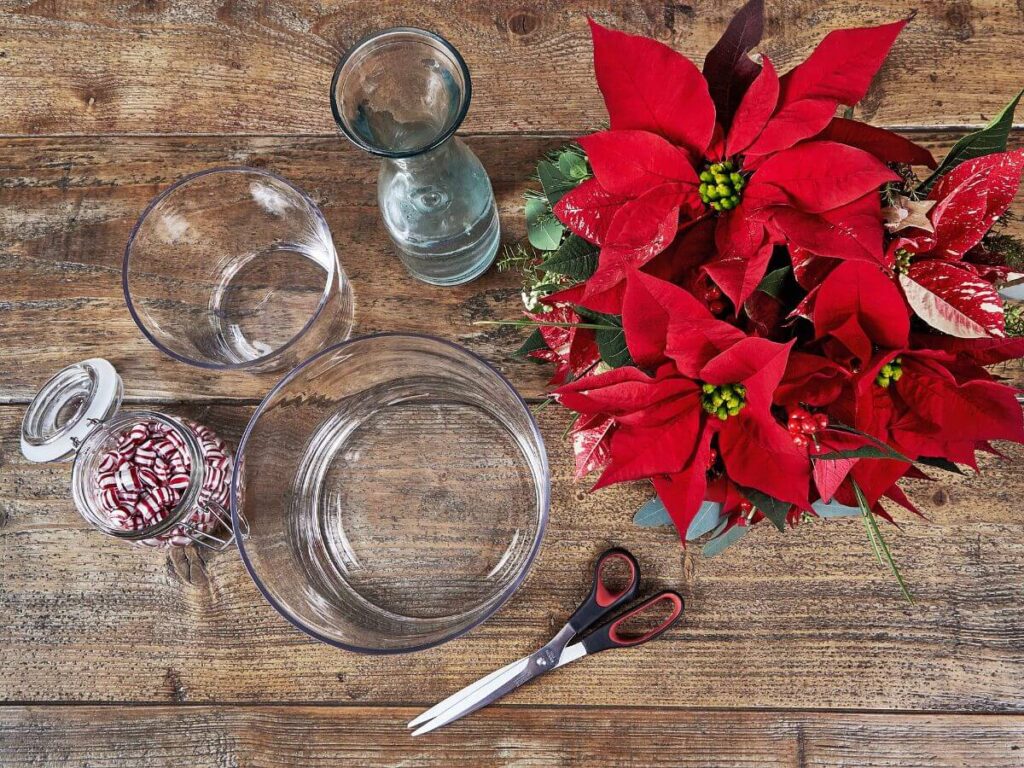
You’ll need:
- One small and one larger glass vase
- Candy
- Scissors
Steps:
- Layer the vases: Place the smaller vase inside the larger one.
- Candy time: Fill the space between them with candy.
- Add water: Fill the smaller vase with fresh water.
- Trim the poinsettias: Cut your poinsettias to size and arrange them inside the smaller vase (you can prepare a bouquet or shape them as you go).
This candy vase will look stunning on your entryway table!
Amazon picks:
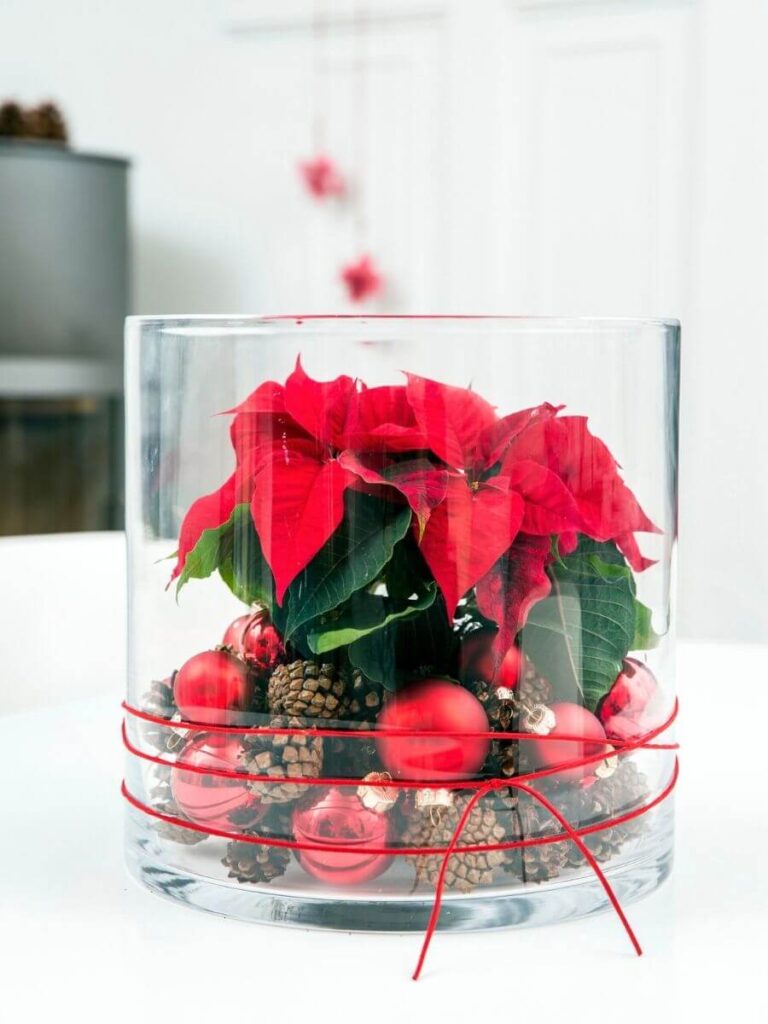
Idea 6: Mini Table Terrarium from a Vase
Transform a simple vase into a magical Christmas terrarium!
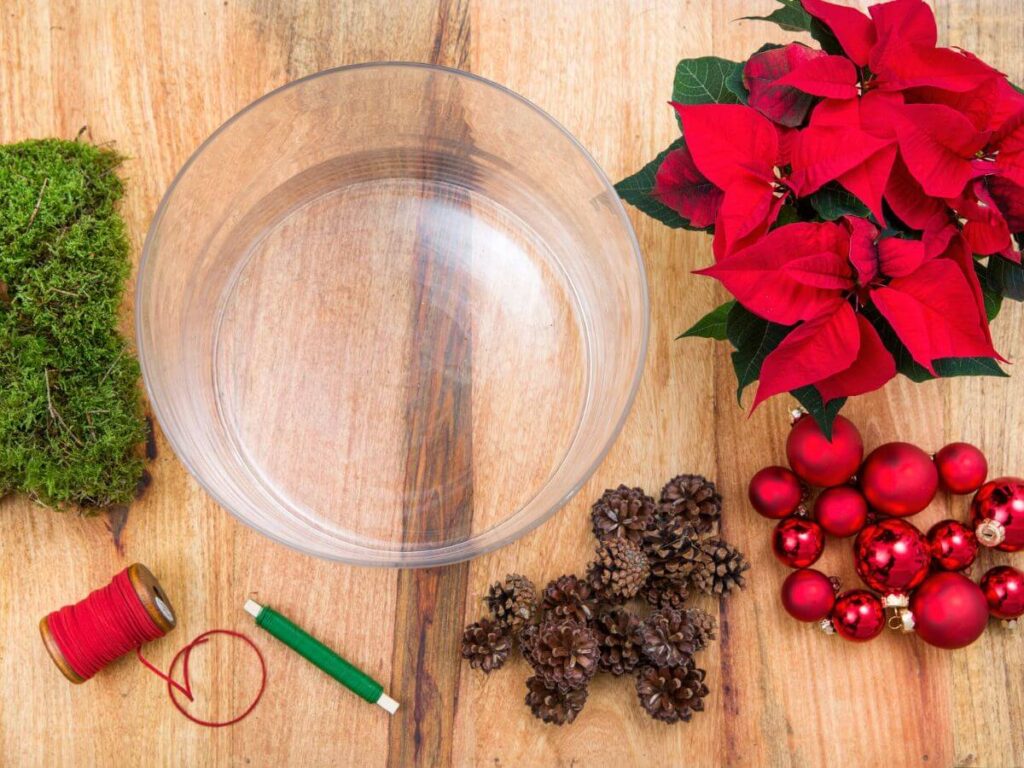
You’ll need:
- Moss
- Pinecones
- Decorative ornaments
- Green floral wire
- Red string
- Potted poinsettia
Steps:
- Wrap the pot: Cover the pot with moss using the green floral wire.
- Decorate: Place the moss-covered pot inside the vase and add pinecones and ornaments to your liking.
- Add the finishing touch: Wrap the red string around the vase for a festive feel.
Place this beautiful terrarium on your dining table and don’t forget to water the poinsettia occasionally!
Amazon picks:
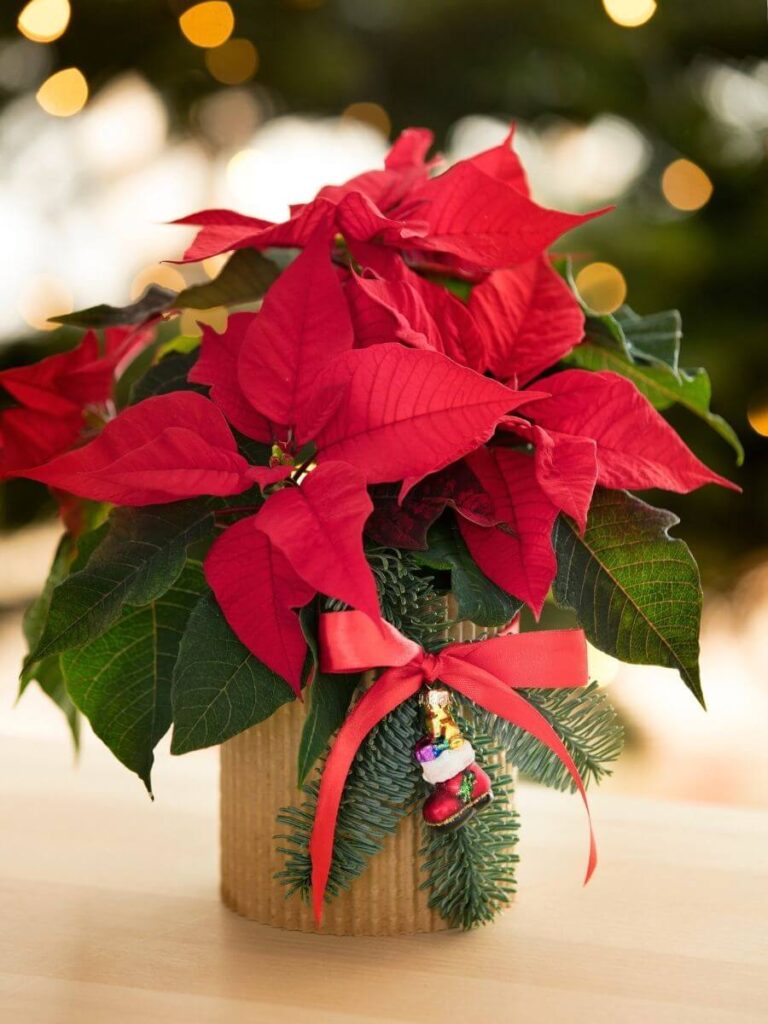
Idea 7: The Fastest Poinsettia Gift
Do you need a last-minute gift? This adorable poinsettia in a can is both quick and easy to make!
You’ll need:
- Empty tin can
- Decorative paper
- Hot glue gun
- Pine branch
- Ribbon
- Small Christmas ornament
Steps:
- Prepare the can: Remove the label from the can and clean it. Use a can opener that doesn’t leave sharp edges.
- Decorate the can: Glue the decorative paper around the can using a hot glue gun.
- Add a festive touch: Attach a pine branch (1) and a small Christmas ornament (2) to the can with a ribbon.
- Insert the poinsettia: Place a potted poinsettia inside the decorated can.
This 5-minute gift is fun for all ages to make. Get creative and enjoy the process!
Amazon picks:
If you’re already deep into Christmas decorating, read this post for inspiration: 21 Festive Christmas Mantel Decor Ideas You’ll Love | Bloom and Boughs
Conclusion
There’s nothing quite like the satisfaction of turning simple materials into something beautiful for the holidays. With just a few easy steps, you can transform everyday items like cans, bottles, and vases into festive decorations that capture the spirit of Christmas. Whether you hang a trio of poinsettias, craft a terrarium, or create a last-minute gift, each project will surely spread holiday cheer. So, gather your supplies, and let your home sparkle with the joy of handmade Christmas décor! Happy crafting!
All photos used are the property of https://starsforeurope.com/en/.











0 Comments