Hey there,
There’s something so satisfying about giving old furniture a second life. Instead of throwing it away, why not turn that worn-out chair or forgotten nightstand into a stunning new home for your plants? In this blog post, I’ll show you step-by-step how to create beautiful DIY plant stands using vintage finds. It’s an eco-friendly, creative way to decorate your home—and it’s easier than you might think!
Let’s get started!
Why Upcycled Furniture Ideas Are Perfect for Plant Lovers
Upcycling is more than just a trend—it’s a fun and meaningful way to make your home more personal and sustainable. By repurposing old furniture into stylish plant displays, you’re not only saving money but also helping the planet. Plus, every upcycled piece tells a story and adds real charm to your space.

Instead of buying something new, you can turn what you already have—or what you find at a flea market—into something truly unique. A small dresser becomes a mini jungle. A tired chair seat becomes a cozy spot for your favorite pothos. Even denim pockets can be turned into cute hanging planters!
What You Need for These DIY Plant Stand Projects
Before we jump into the fun part, here’s a simple list of what you’ll need:
- Vintage furniture pieces (like chair seats, small dressers, bedside tables)
- Sandpaper
- Eco-friendly primer and paint
- Non-toxic, clear protective varnish
- Metal or plastic plant liners (to protect the furniture)
- Drill, screwdriver, and glue gun
- Decorative extras (macrame holders, fabric liners, old denim pockets)
Optional:
- Spray paint for quick finishes
- Chalk paint for a rustic look
- Small wheels if you want to make your plant stand mobile
Furniture Upcycling Projects: Step-by-Step Guide
1. Choose Your Vintage Treasure
Look for small furniture pieces that are sturdy but have seen better days. Wooden chairs with broken seats, old nightstands with missing drawers, or even short bookshelves work great.
Tip: If you’re on a budget, check local thrift shops, flea markets, Facebook Marketplace, or even curbside giveaways!
2. Prepare the Furniture
Before you start decorating, make sure your piece is clean and safe to use.
- Wipe off any dust and dirt.
- Sand rough surfaces to smooth them out.
- Tighten any loose screws or add a little wood glue where needed.
3. Painting and Finishing
Now it’s time to add color and character!
- Apply a primer to help the paint stick better.
- Choose eco-friendly paint in a color that matches your style.
- After the paint dries, add a clear, non-toxic varnish to protect your project from water and humidity.
Quick Tip: If you’re short on time, use spray paint—it gives fast and even coverage!

4. Create Plant Holders
Depending on your furniture, you can add a plant liner or a small pot directly into the piece.
- For chairs: Remove the seat and replace it with a strong liner or basket.
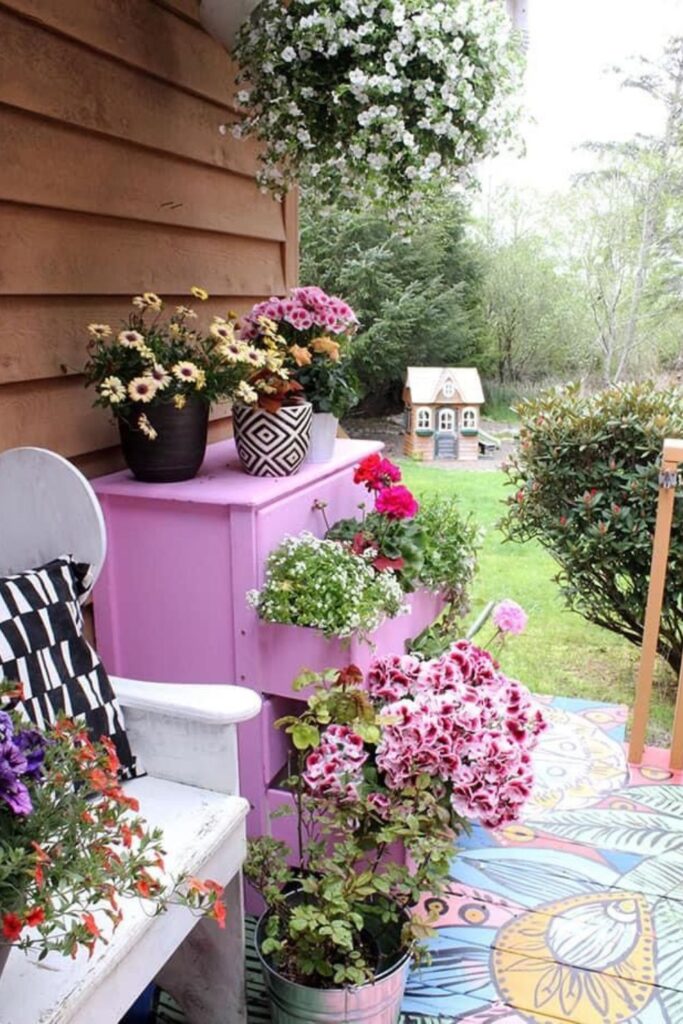
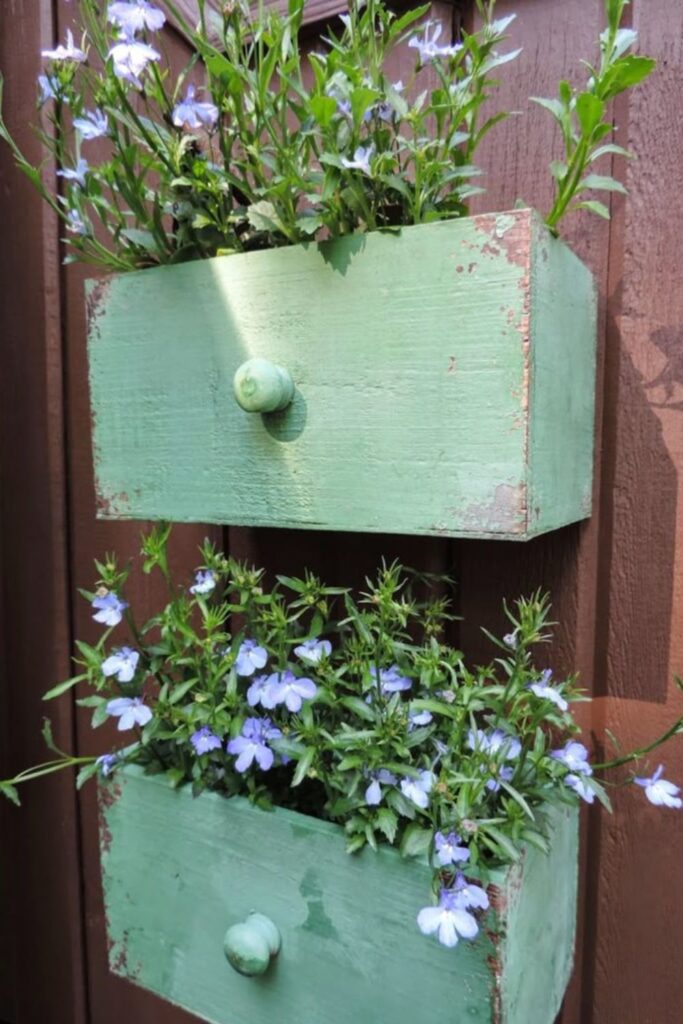
- For nightstands: Remove a drawer and add a deep liner or a group of small pots.
- For small tables: Place large potted plants directly on top and secure them if needed.
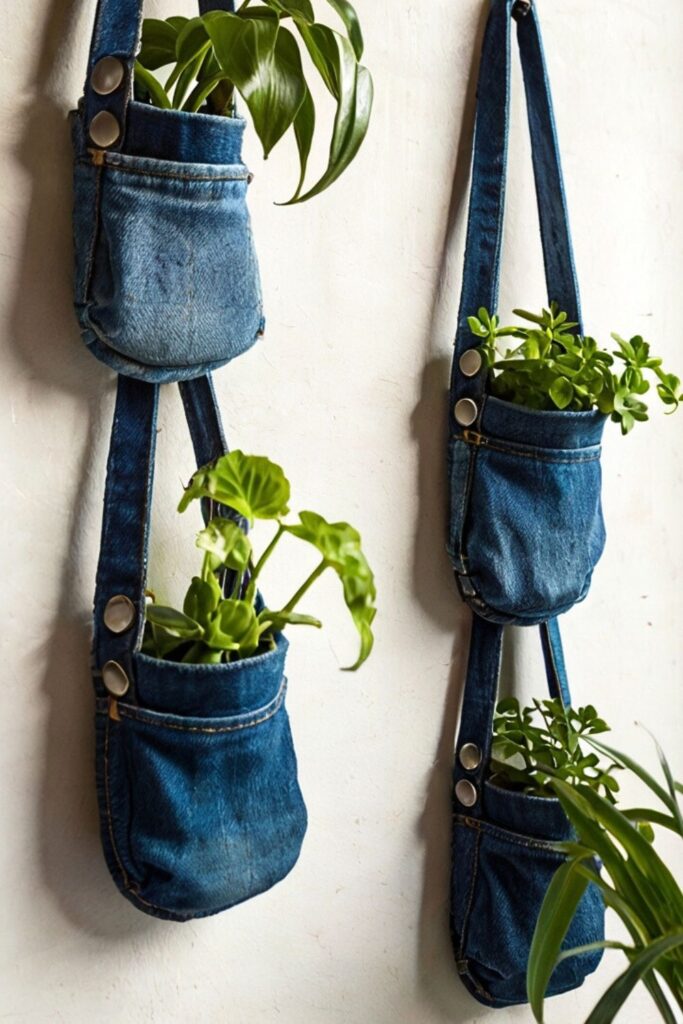
Creative Idea: Cut old denim pockets from jeans, sew them into little plant holders, and attach them to the sides of your upcycled piece!
5. Decorate Your Plant Stand
Once your base is ready, add personal touches like:
- A macrame hanger for trailing plants
- A pretty fabric liner inside drawers or baskets
- Fairy lights for extra charm
- Vintage handles or knobs for a polished finish
Make it yours! The goal is to create something that feels cozy and fresh in your space.

How to Upcycle Furniture into Plant Stands for Any Space
No matter the size of your apartment or home, you can make these DIY plant stands fit perfectly. Here are a few placement ideas:
- Entryways: A repurposed nightstand makes a beautiful welcome table filled with greenery.
- Living rooms: Old side tables are perfect for holding tall plants like fiddle-leaf figs.
- Bedrooms: A small stool by the window can be a cozy corner for ferns or hanging ivy.
- Balconies: Short bookshelves work well for organizing a mini herb garden outside.
Mix and match plants of different heights, colors, and textures for a more dynamic look.
Repurposed Furniture for Plants: Unique Ideas You’ll Love
If you want to get even more creative, try these fun upcycled furniture ideas:
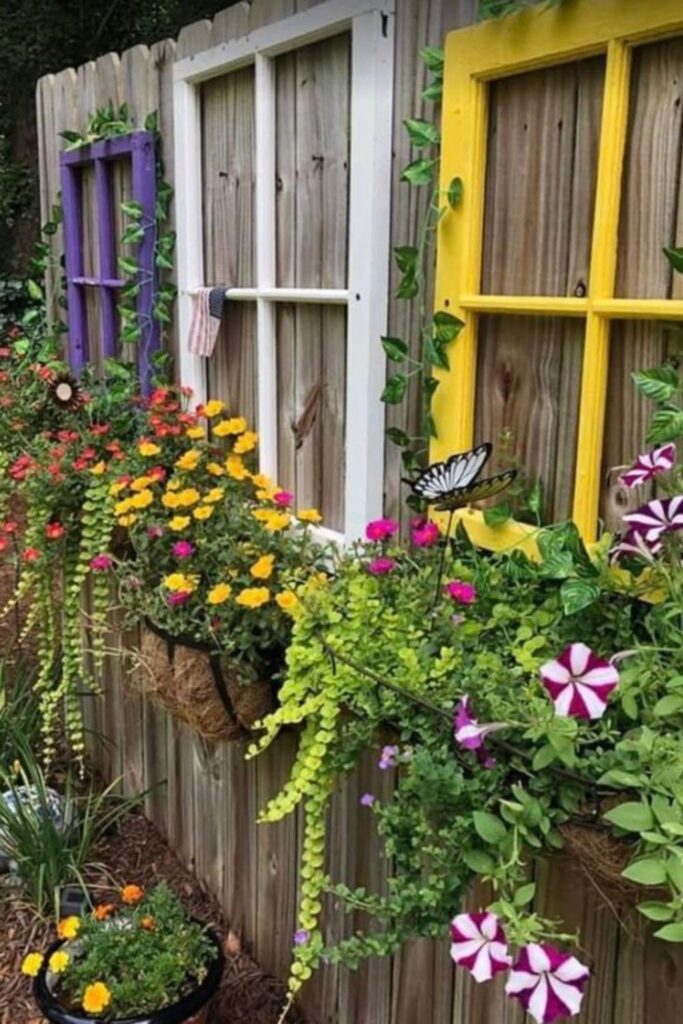
- Old window frames – Turn them into a vertical plant wall with small pouches.
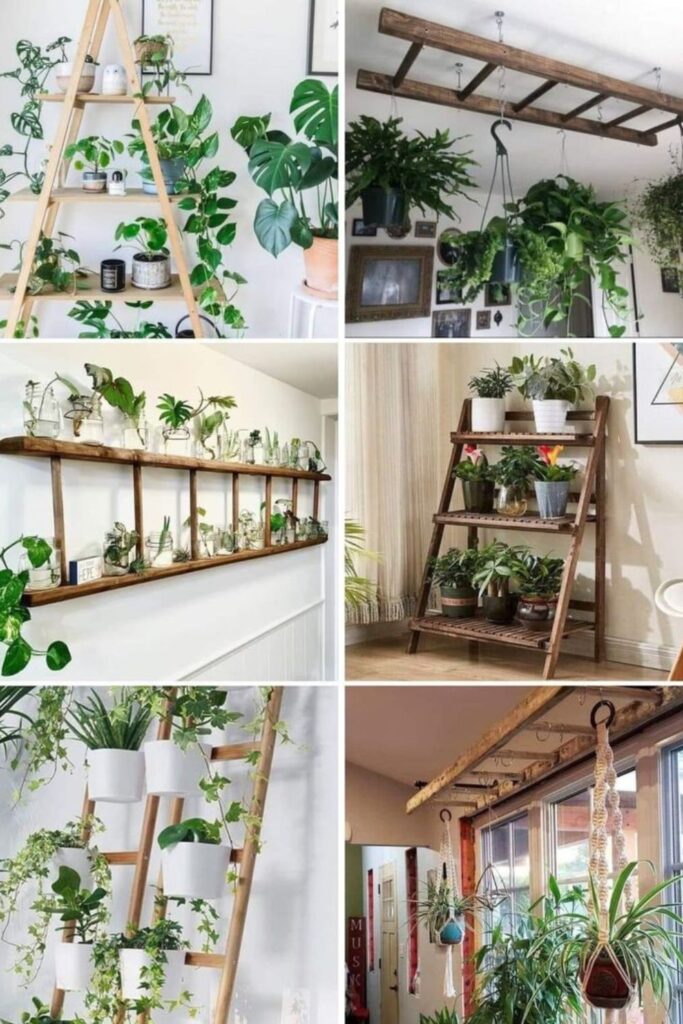
- Broken ladders – Use each rung as a plant shelf.
- Battered trunks or suitcases – Fill them with succulents or herbs.
- Rusty metal buckets – Paint them and use them as plant bases.

Bonus Tip: Add small wheels to the bottom of heavy furniture pieces so you can move your plant stands easily to follow the sunlight!
Plant Display Ideas for a Cozy and Stylish Home
Want your new plant stand to shine? Try these styling tricks:
- Group plants in threes for a balanced look (one tall, one medium, one trailing).
- Play with textures by combining leafy plants with cacti or succulents.
- Use matching colors for pots and the stand to keep the look tidy.
- Layer different heights to make the space feel more alive and vibrant.
And don’t be afraid to show off your upcycled work on Instagram or Pinterest! Your creativity might inspire others to start their own projects, too.
From Old to Gold: More Upcycled DIY Plant Stand Ideas


Related DIY Projects You Might Enjoy:
- Repurposing Household Items as Planters: A Green DIY Adventure | Bloom and Boughs
- 10 Genius DIY Plant Stand Ideas on a Budget | Bloom and Boughs
- Start Repurposing – 10 Creative DIY Planters Using Items You Already Have! | Bloom and Boughs
Conclusion
Turning vintage finds into stylish DIY plant stands is such a rewarding project. It’s affordable, sustainable, and adds a lot of heart to your home. Plus, every time you see your upcycled creation, you’ll remember the fun you had making it—and how you saved a little piece of the world in the process.
So grab that old chair or dusty nightstand, pull out your paintbrushes, and let’s get planting!
🌿 P.S. I’d love to see your upcycled plant stands! Feel free to share your creations with me on Pinterest. Happy crafting!
The photos have been collected from Pinterest and/ or Instagram. I am not the owner of these photos, if it’s yours and you can provide me with a link to your work, I am more than happy to properly credit your work. If you wish your photo to be removed, please let me know which one is the one that you own and wish to be removed.
0 Comments